For New Bedford, Massachusetts homeowners considering DIY fence installation, understanding local regulations, choosing suitable fencing materials, and planning layout are crucial steps. This guide offers valuable tips and step-by-step instructions, from navigating New Bedford’s fencing laws to attaching panels and final touches. By following these practical advice, you’ll ensure your new fence not only enhances your yard’s aesthetics but also complies with local guidelines.
- Understanding New Bedford's Fencing Regulations
- Choosing the Right Fence Type for Your Yard
- Measuring and Planning Your Fence Layout
- Gathering Essential Tools and Materials
- Digging Post Holes: A Step-by-Step Guide
- Attaching Panels and Final Touches
Understanding New Bedford's Fencing Regulations
Before installing a fence in New Bedford, Massachusetts, it’s crucial to understand local regulations and codes. The city has specific guidelines regarding fence heights, materials, and placement to ensure aesthetic uniformity and safety. Check with the New Bedford Planning Department or similar authority to acquire building permits and understand any restrictions on fencing. These regulations can vary based on neighborhoods and property types, so homeowners should research thoroughly before breaking ground.
Fencing regulations in New Bedford often dictate permitted fence materials, colors, and styles to maintain a harmonious look throughout residential areas. Understanding these rules is essential to avoid costly fines or the need for future modifications. Once you grasp the local guidelines, you can choose fencing options that complement your home’s exterior and meet all necessary requirements.
Choosing the Right Fence Type for Your Yard
When considering DIY fence installation, choosing the right fence type is a crucial first step. For New Bedford homeowners, climate and local aesthetics play significant roles in selection. Wood fences are popular for their natural beauty and ability to blend with the landscape, but they require more maintenance than other options. Vinyl fencing is low-maintenance, durable, and available in various styles, making it a versatile choice. Chain link fences offer security without obstructing views and can be easily installed for a budget-friendly option.
Consider your yard’s unique features and preferences when narrowing down choices. Think about the level of privacy needed, desired aesthetic, and how well different fence materials stand up to Massachusetts’ changeable weather conditions. Researching local building codes and regulations is also essential to ensure compliance and avoid unexpected delays during installation.
Measuring and Planning Your Fence Layout
Before you begin installing your new fence, it’s crucial to take time for meticulous planning. Start by visualizing where you want your fence to go and considering its functionality. Will it enclose a backyard garden, create a privacy barrier, or define property lines? Once you have a clear purpose in mind, grab your measuring tape and start taking measurements.
Plot out the dimensions of your desired fence layout on paper or use a handy app that assists with land surveying. Keep in mind local regulations regarding fence height and placement. New Bedford, Massachusetts typically has specific guidelines about where fences can be built and their maximum heights, so ensure you’re compliant to avoid any legal hiccups during or after installation.
Gathering Essential Tools and Materials
Before starting your DIY fence installation project, make sure you have all the necessary tools and materials. This includes measuring tape for accurate measurements, a level to ensure your fence is straight, and post-hole diggers or an electric drill with a hole-drilling bit to create holes for the fence posts. You’ll also need concrete for setting the posts, a hammer or sledgehammer for driving the posts into the ground, and any required hardware like brackets and screws. Additionally, consider safety gear such as work gloves, safety glasses, and ear protection during installation. Gather these essentials beforehand to ensure a smooth and efficient fence-building process.
Digging Post Holes: A Step-by-Step Guide
To begin digging post holes for your fence, start by marking the locations where each post will be placed along your desired fence line. Use a measuring tape and chalk to ensure precision. Next, gather your tools: a post-hole digger or an excavator (depending on the size of your project), a level, and a hammer.
Digging can begin! Using the post-hole digger or excavator, create holes that are deep enough to accommodate at least one third of the fence post’s height. Ensure the holes are wide enough for the posts to fit comfortably. After digging, use the level to check the depth and angle of each hole, making adjustments as needed until they’re perfectly vertical.
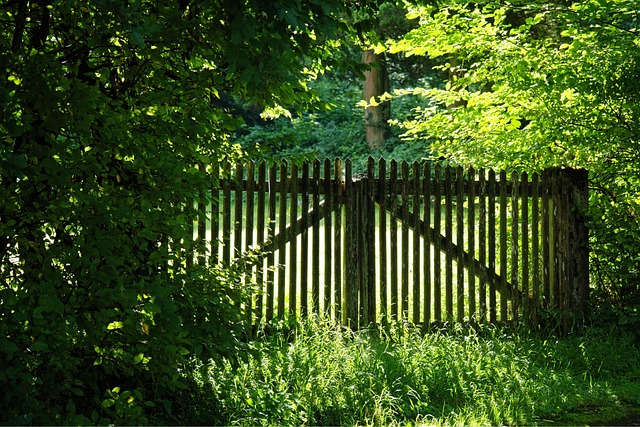
Attaching Panels and Final Touches
After successfully installing the fence posts and attaching the rails, it’s time to focus on the panels and final touches. Start by securing the fence panels to the rails using suitable hardware, such as brackets or nails. Make sure the panels are level and aligned properly, creating a seamless barrier. For an extra layer of protection, consider applying a protective coating or paint to the metal components, especially if your fence is exposed to harsh weather conditions.
Once the panels are in place, add any desired finishing touches, such as decorative caps on the posts or a gate for enhanced security and aesthetic appeal. Regularly inspect these components to ensure they remain tight and secure, preventing any potential hazards or damage to your property.